宝玉 (@dotey) · 10/10/2026, 04:57:26
Baoyu Details AI Agent Workflow for Open Source Projects: From Tech Specs to UI Prototypes and Code Validation
Developer Baoyu demonstrates a full-cycle methodology using AI Agents in the open-source project baocut, covering system design, prototyping, coding, and testing. The core strategy prioritizes documentation and high-fidelity prototypes before code implementation to minimize token costs and rework. By leveraging Electron for autonomous agent validation, humans focus solely on problem definition and final acceptance, achieving an efficient human-AI collaborative development loop.
SOURCE COVERAGEOriginal coverage
The methodology described in this article is fully applied to my open-source project, baocut (https://t.co/wldDX9MSVR), covering system design, prototyping and UI design, coding, validation, and release.
For example, I recently refined the subtitle styling feature by adding more diverse subtitle styles.
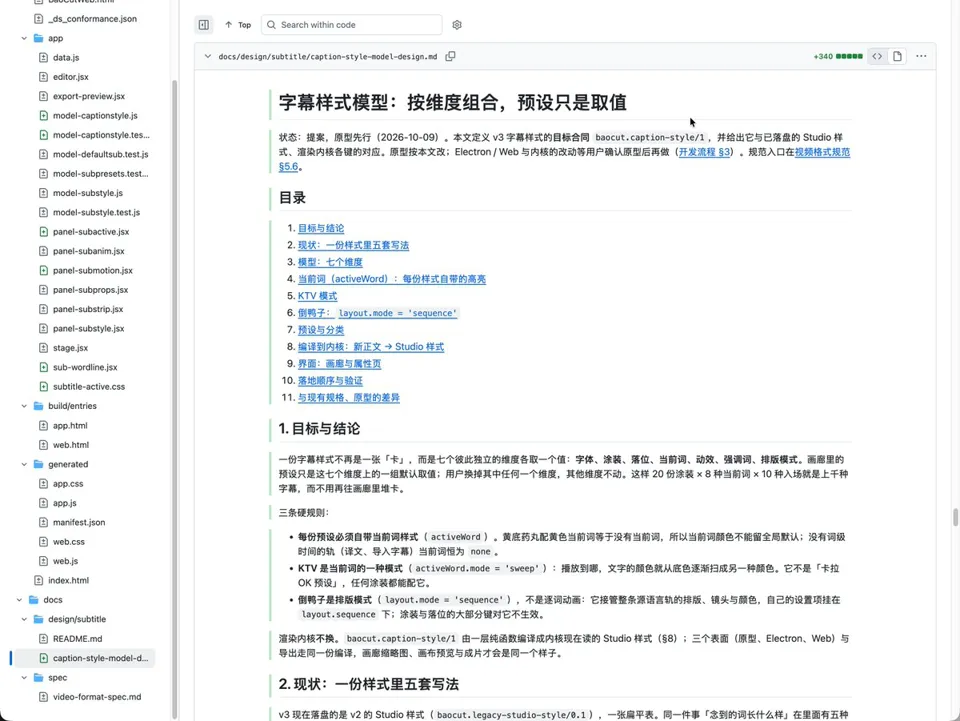
Step 1: Write a Technical Design Document (see Figure 1)
Based on my requirements, the Agent conducted analysis and research, then drafted a technical design document. I reviewed it carefully, provided feedback, and after several iterations, we finalized the document. Reference document: https://t.co/ST2vgL0ZVq
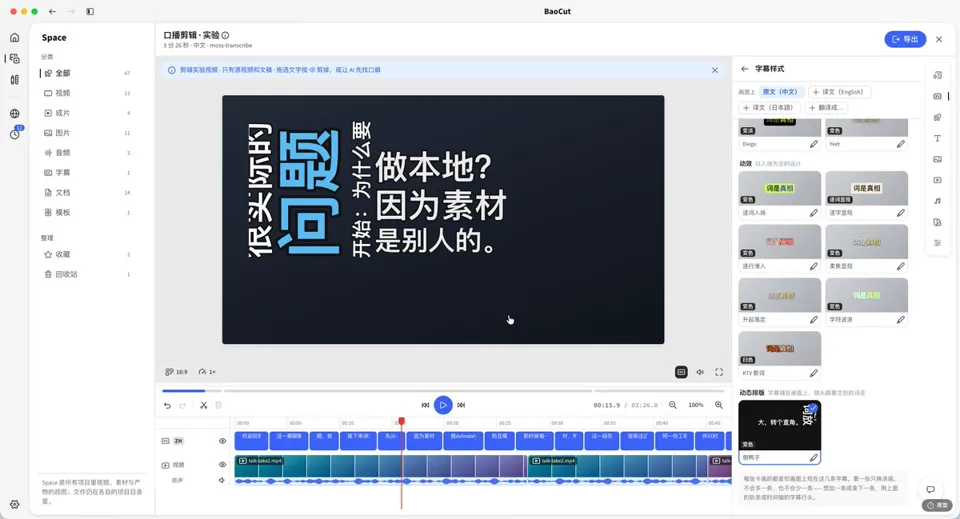
Step 2: The Agent Creates Prototypes and UI Designs Based on the Specs (see Figure 2)
If technical design determines the architectural direction, prototyping defines the UI and interactions. We don't jump straight into modifying code because prototypes are low-cost to implement and easy to modify. This allows you to quickly see the final look and feel, enabling the Agent to receive rapid feedback from you.
Implementing changes directly in the final codebase incurs significantly higher time and token costs if modifications are needed later.
Note that prototype and UI design should ideally be integrated, with high fidelity being preferred. This minimizes rework during implementation. If you look at my prototypes, they are virtually indistinguishable from the final UI; the only difference lies in the backend logic. Prototype logic is simulated, simple, and often buggy—but that’s perfectly fine.
Step 3: Implement the Code
Once the technical solution and UI design are settled, implementation becomes relatively straightforward. If the earlier stages were thorough, there’s little need for rework here, allowing the feature to be completed in one go.
Step 4: Testing and Acceptance
Typically, the Agent handles its own acceptance testing. I eventually reverted the tech stack to Electron. For an Electron app, the Agent can verify most features via the browser without needing Computer Use; only complex scenarios require Computer Use assistance, resulting in high verification efficiency.
The faster the Agent receives feedback, the quicker the development loop runs, leading to higher overall efficiency.
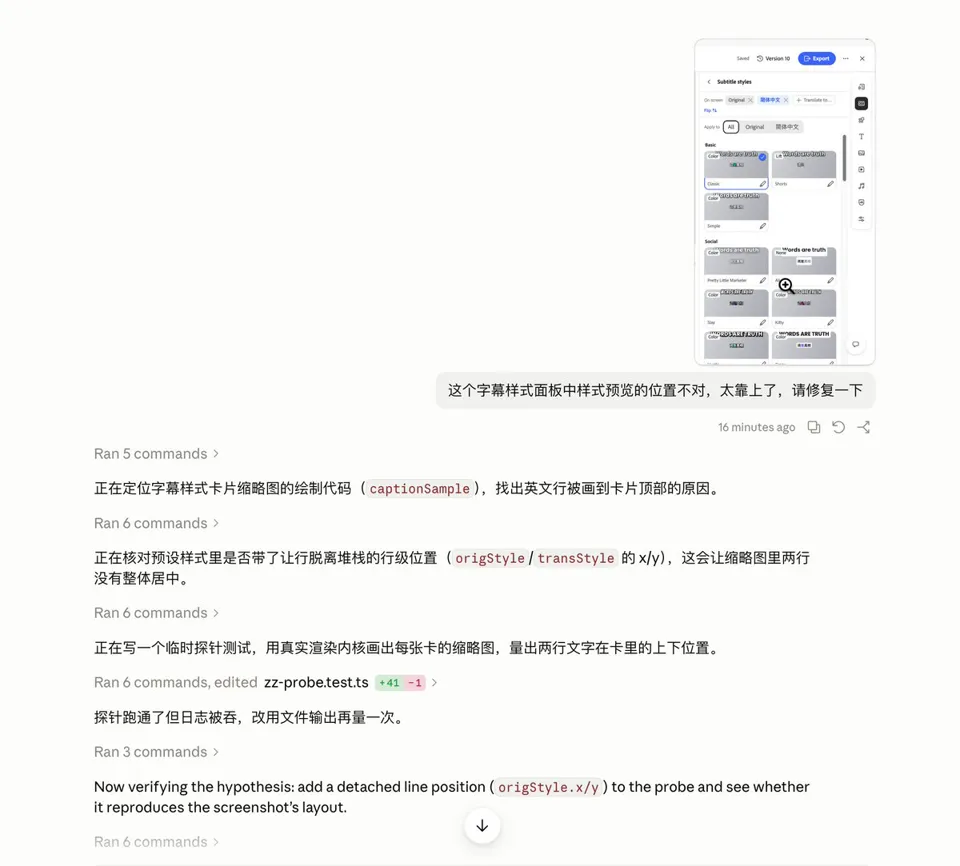
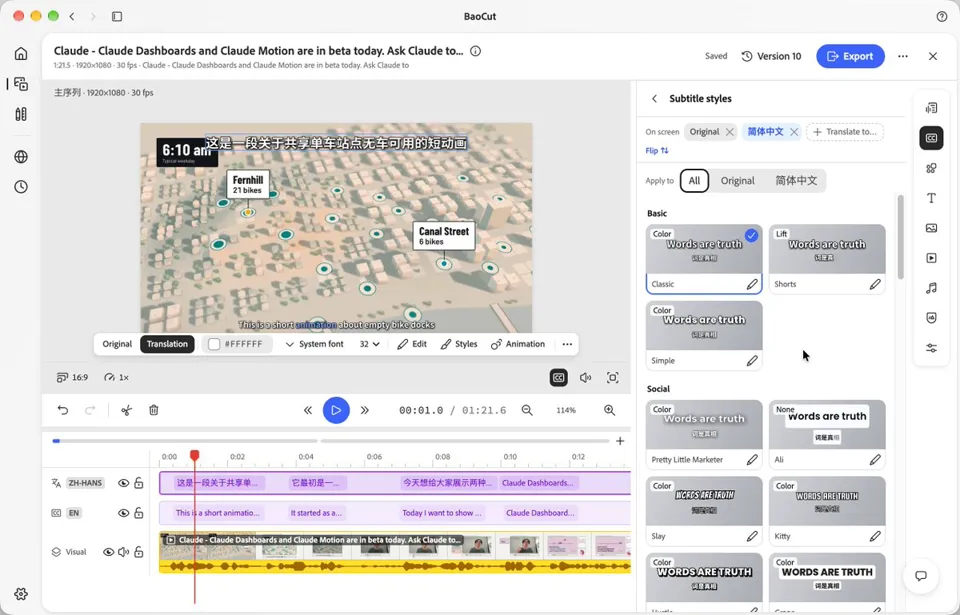
After the Agent finishes testing, I run my own tests, checking edge cases thoroughly. The focus is on validating the newly modified feature. For instance, during my test, I noticed the text in the subtitle style preview was positioned too high. I simply told the Agent to fix it (see Figure 3).
Finally, once testing passes, we’re done. During this process, the Agent handles most of the work. The human’s primary role remains at the two ends: defining the problem and accepting the results. Everything else—including minor tasks like adjusting style positions—is delegated to the Agent. The time saved is enough for me to write a tweet like this.
↳ Quoting @dotey (Baoyu): https://x.com/i/article/2108557881763037184